We’ve got WordPress installed, and it’s up and running, but it’s still showing the “default” site.
Our first order of business is to make a number of tweaks to settings to further secure the site, and begin to add content. We’re not going to change any look-and-feel just yet; that’ll come shortly.
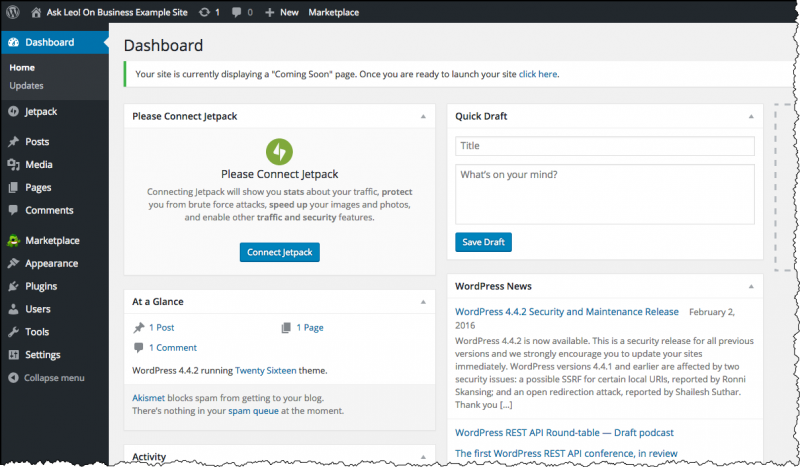
Just as a reminder, log in to your WordPress administration page by visiting <yourdomainname>/wp-admin in any browser. Once you log in, you’ll see the WordPress dashboard.
Get your name on it
The first thing we’ll do is replace most of the default information currently being displayed.
Click on the Posts link in the left-hand navigation column to be taken to the list of posts. (I’ll cover just what a “Post” is, and how it differs from a “Page”, a little later. For now, we’re simply going to focus on displaying information that’s more relevant to you and your situation.)
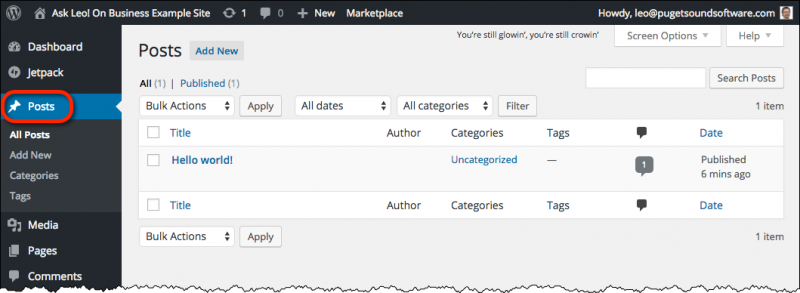
Click on Hello World!, the title of the first post, which we’re going to edit.
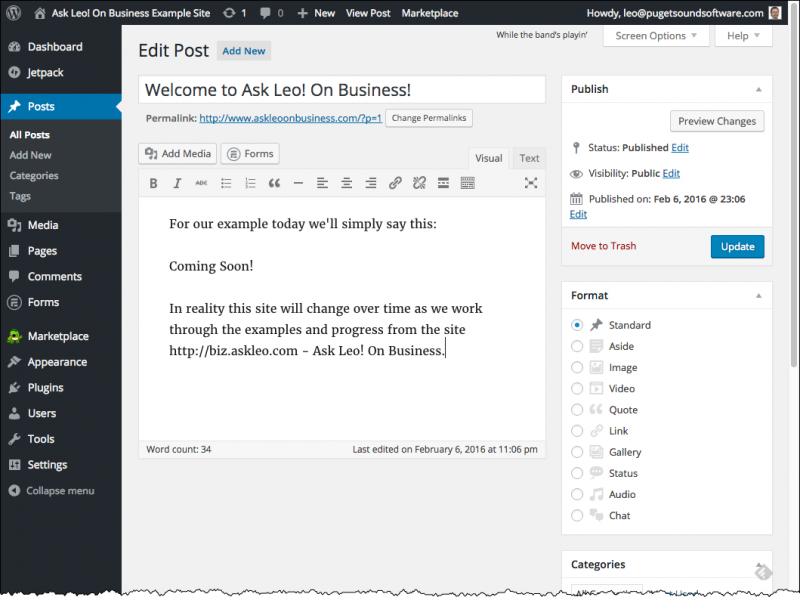
Change the title of the post to be whatever you would like. As you can see, I’ve changed the title to “Welcome to Ask Leo! On Business!”
Replace the body of the post with some text to welcome people to your site. I’ve simply included a few words indicating that this is an example site, it’s “Coming Soon!”, it’ll change over time, and it’s all related to what I’m doing here on Ask Leo! On Business.
Click on the Update button to the right.

At the top of the page, underneath the “Howdy” with your log-in name, is Screen Options. Click on that, and a number of options will slide down from the top of the page.
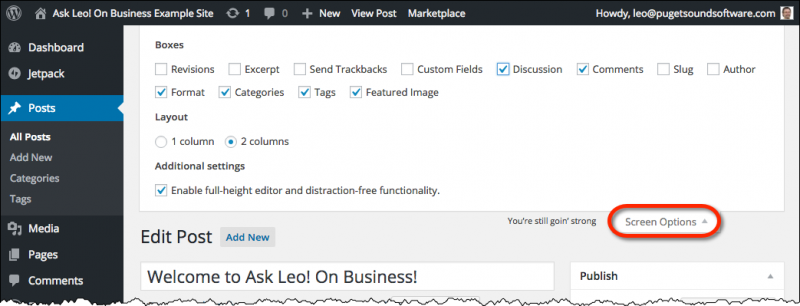
These are options that control what is actually displayed on the page. Since not everyone uses every option, WordPress makes it possible to display only those items that make sense for you. (If you ever note that something’s not displayed on an edit page like this, check that Screen Options link at the top of the page – it can get reset or changed in some circumstances.)
Naturally, the defaults don’t quite cover everything we want right now, so after displaying the screen options, click on Discussion and Comments to check each. The related section displays immediately, though it’s very likely off the bottom of your screen. Click on Screen Options again to hide the settings.
Scroll down to the newly-visible Discussion and Comments sections.
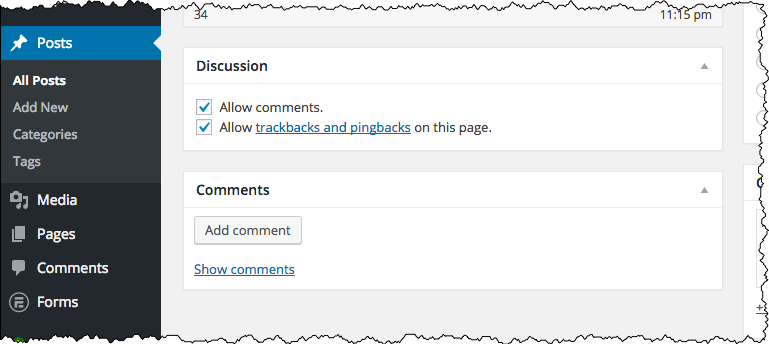
Click on Show comments.
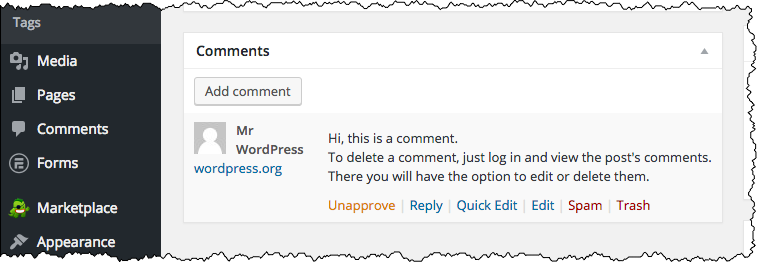
The actions – Unapprove, Reply and so on – may not appear until you move your mouse over the comment itself. Do so, and then click on Trash.
Now let’s visit your site.
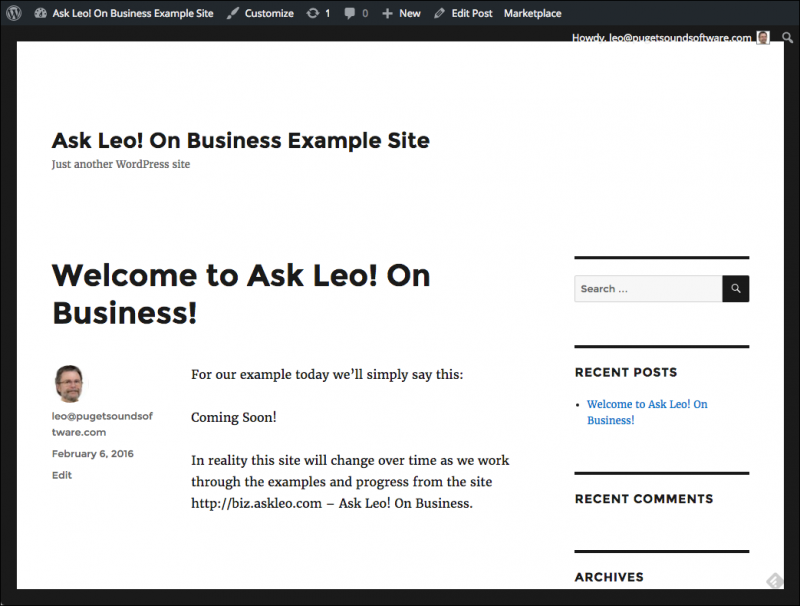
Now, at least, the site provides a little useful information to anyone who visits it. More importantly for now, search engines have something other than the WordPress default to see. If you wanted, you could include additional information in this initial post telling people what to expect, where to find you, or whatever else makes sense.
Clean up plugins
As I mentioned before, plugins are a way to add functionality to WordPress. Plugins can run the gamut from simple display tweaks to entire frameworks of functionality, such as shopping carts, discussion forums, membership sites, and more.
Your initial install of WordPress, particularly one-click installs provided by hosting companies, typically include several plugins by default.
Plugins have two states you can control:
- Whether the plugin is even present at all, meaning whether or not it’s installed.
- For those plugins that are installed, whether or not they’re turned on, or “active”.
There are various reasons why you might have a plugin installed but not active – typically because you’re expecting to need it at some point in the future, or you’re debugging some kind of unexpected behavior.
My philosophy, though, is to actually uninstall any plugins I don’t plan to use. WordPress is a tiny bit faster, safer, and less confusing if you don’t even have plugins you don’t plan to use.
So let’s uninstall the plugins we don’t plan on using. We can always install them again later, should we change our mind.
Click on the Plugins item in the left navigation bar to display the current set of installed plugins.
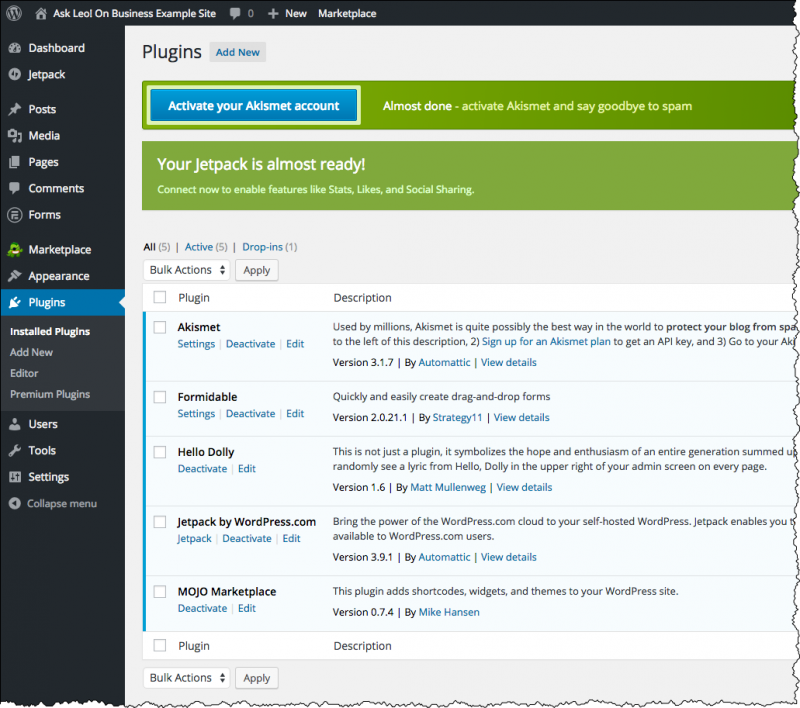
In our example, I’m going to click on the checkbox next to the following plugins:
- Formidable
- Hello Dolly
- Jetpack
- MOJO Marketplace
Then click on the “Bulk Actions” dropdown and click on the Deactivate item. These are all plugins I don’t expect to use any time soon, but choose to keep available.
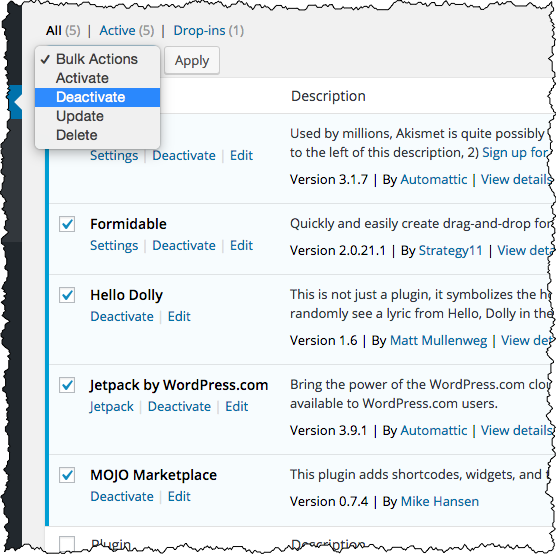
Click on Apply to deactivate the selected plugins.
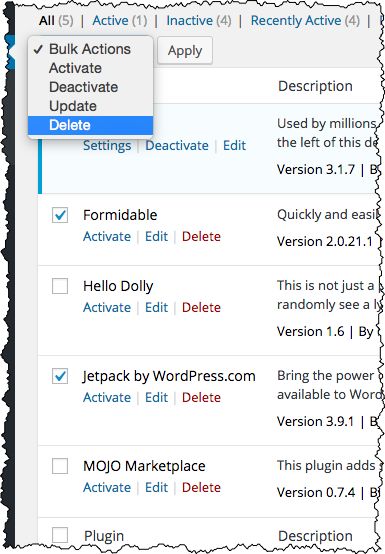
Now I’ll click the checkbox for the following plugins:
- Formidable
- Jetpack
These are two plugins I have no plans to use, and are easily replaceable, so I’m going to delete them.
Once again, click on the “Bulk Actions” dropdown, and this time, click on Delete.
Click on Apply to delete the selected plugins. You’ll need to confirm the deletion.
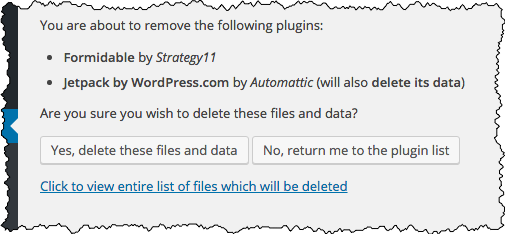
Plugins can store and maintain data with your WordPress install, so deleting plugins means that not only will the plugin be removed, but any data (such as configuration information you’ve specified) may also be removed. Since we’re just starting, that’s not an issue.
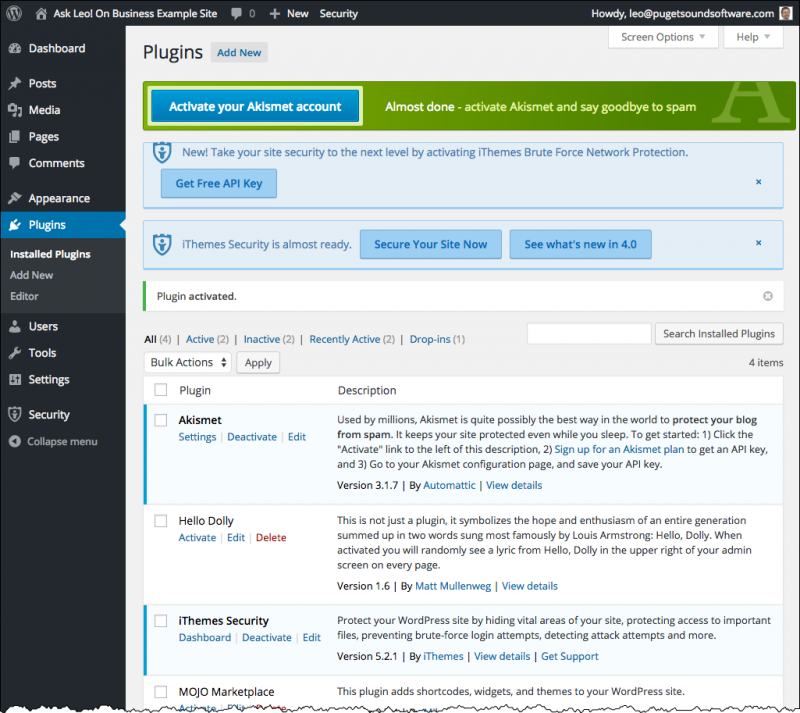
I’ve left “Hello Dolly” installed because it’s benign and it has a tendency to come back every time that WordPress is updated, and “MOJO Marketplace” because, to be honest, I couldn’t find a source to reinstall it in the unlikely event that I ever wanted it back.
Now that we’ve paired down the plugin set to the one plugin we’ll eventually use – Akismet, which I’ll cover in an upcoming article – it’s time to increase our security.
Adding a security plugin
As I mentioned before, an extremely unfortunate reality of today’s internet is that all websites and servers are under fairly constant attack from automated tools used by hackers and others to sniff out websites vulnerable to compromise.
Needless to say, we don’t want our website to get hacked.
We’ll install a security plugin to further harden our WordPress installation: iThemes Security.
After you clicked on it earlier, several items appeared underneath the “Plugins” item in the lefthand navigation bar. One of them is Add New. Click on that.
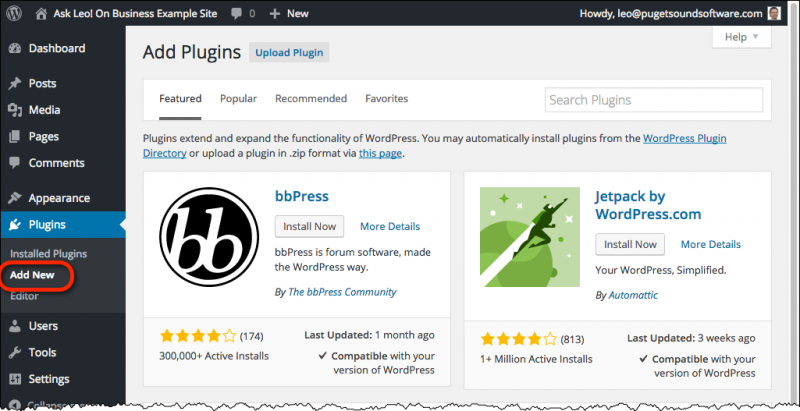
In the “Search Plugins” box in the upper right, type “iThemes Security” and press Enter. The first result should be the iThemes Security plugin.

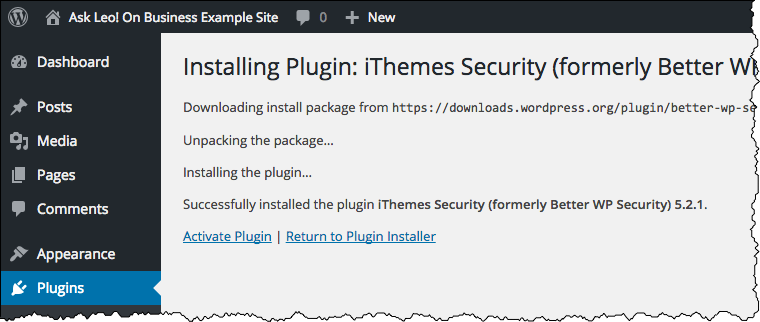
Click on Install Now. The plugin will be downloaded and installed. Click on Activate Plugin.
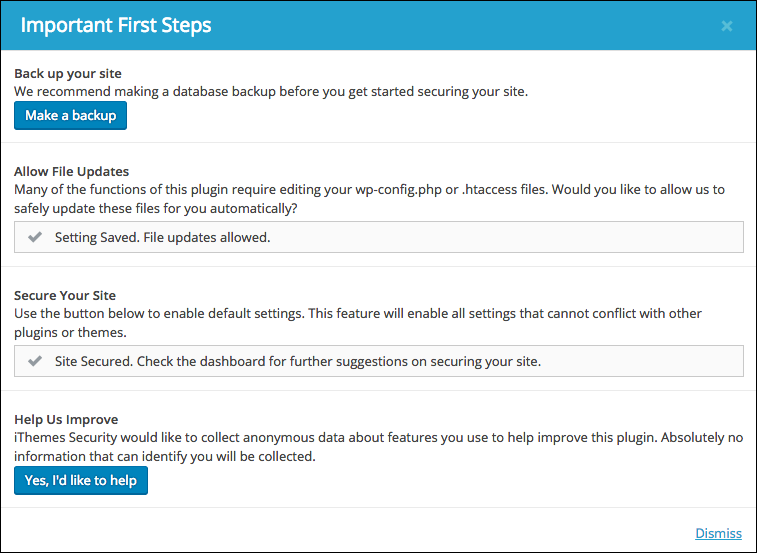
iThemes Security is a large and comprehensive plugin with many, many settings. However, the plugin comes with a very simple default set-up. Click on the Secure Your Site Now button.
Since we’re just starting out, we don’t really need to make a backup just yet.
Click on Allow File Updates, and then on One-Click Secure.
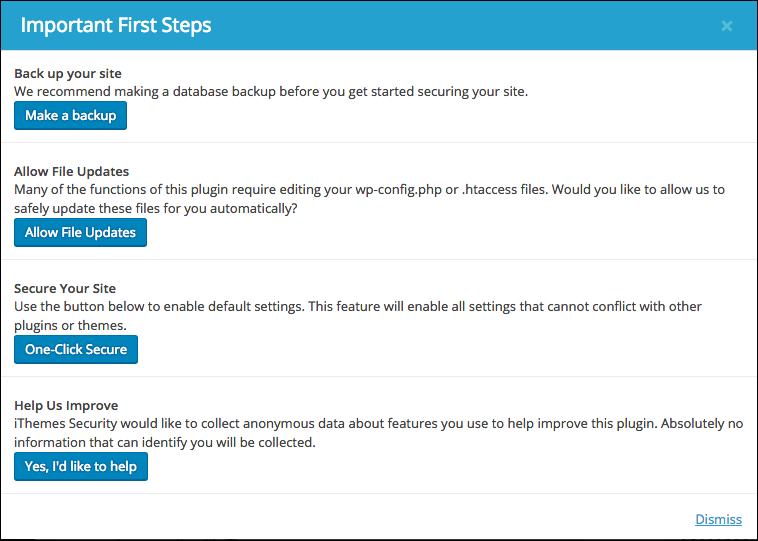
That’s a fine place to start. You can browse the iThemes Security dashboard at your leisure for more of its options and details.
One last tweak for now
There is one more change we want to make now, mostly because iThemes Security needs this change in order to operate completely.
If you had additional posts or pages on your site, direct links to them would look like this:
http://www.askleoonbusiness.com/?p=1
In fact, that’s the direct link to the single page we edited earlier.
What we would prefer (for several reasons, but mostly to provide additional information to search engines), is for the full link to a page to be based on its title, not some random number.
To make that change, click on Setting, in the left hand navigation bar, and underneath that, click on Permalinks (short for “permanent links” to specific pages).
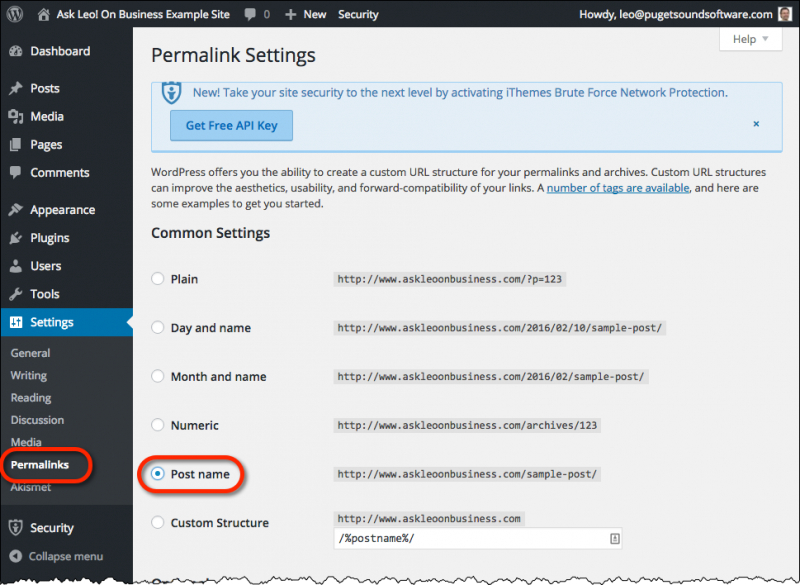
Make sure that Post name is selected, and click on Save Changes near the bottom of the page.
Now the link to our post has changed to its original title:
http://www.askleoonbusiness.com/hello-world/
Any new posts or pages will have links based on the title we specify. (Since this post was one originally called “Hello World!”, that’s its original title. There are ways to change it, but for now this is enough.)
More importantly, because of the changes that happened under the hood to make this happen, iThemes Security is happy and can provide full functionality.
Next steps
We’re actually not quite done tweaking some of our WordPress settings, but we’ve got the most important ones out of the way.
You may notice that we actually spent very little time in the “Settings” menu. That’s what I’ll review next time.
Podcast: Download (Duration: 8:51 — 4.1MB)
Are these plug ins free or are you paying for them? If they’re free, it’s hard to see how they stay in business.
Most are free. Most also have either premium features that are available at an additional cost, or other restrictions (such as commercial use, or a certain volume of us) that trigger payment requirements. One example is Akismet: Ask Leo! absolutely pays for the service – worth every penny, by the way – based on the volume of spam I have to combat.
I have just started building a business website and am following your excellent instructions, step by step. As per your recommendation, I installed and activated the iThemes Security plugin. Now I am getting a message that say “New! Take your site security to the next level by activating iThemes Brute Force Network Protection. Get Free API Key”. Do I want to do this?
You can if you like. (I do.) But at this stage it’s more or less optional, and I elected to keep the already lengthy instructions from getting even longer.
I love that you are doing this right now. The timing is perfect for me. The last website that I did was about 10 years ago and it was done with Frontpage 2003.
Hello Leo,
I’ve been reading about a free plug-in called Let’s Encrypt which enables SSL. What do you think of this, please, and could I add it to my WordPress site without conflict with the Ithemes security plug-in? Many thanks.
Best regards,
Geoff Wright
As I understand it, it’s not a plugin, but an initiative from the Electronic Frontier Foundation to make it easier for website owners to get SSL certificates. https://letsencrypt.org/ There are pros and cons to their approach (biggest con is that the certificates have a short lifespan, and must be updated regularly – perhaps they’ve created a plugin for that).
SSL and https in general is pretty advanced, and unless you’re dealing with sensitive information it’s not something I recommend spending time on at the early stages of your web site.
Leo I’m struggling with something that’s probably very simple.
I want the logo image on the top of my WordPress site to be clickable, like yours’.
For the life of me, I can’t find a place to put a URL attached to my header logo.
How do you do it?
That’s typically a function of the theme you happen to be using. What theme are you using?