“Great,” I can hear you thinking, “now I have twice the work: a website and a mailing list I have to deal with.”
Well … yes and no.
What we’re going to do today is hook up your mailing list to your web site, so sending a message to your mailing list is as easy as publishing a post on your site.
In fact, it’s exactly the same.
First, however, I need to introduce a concept and define a term or two.
Your website has a “feed”
Assuming you have your website set up using WordPress, as in our example, it has something you’re probably not aware of: a “feed”, or more correctly, an “RSS feed”.
“RSS” stands for Really Simple Syndication, and is a way for websites to distribute their content to other places automatically.
Visit your website, but add “/feed/” to the URL: for our example, I’ll visit askleoonbusiness.com/feed/.
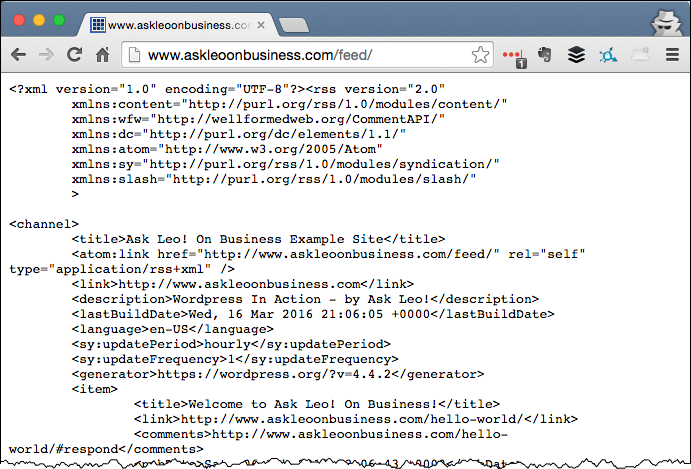
What you’ll see depends on your browser, but. In this example, Chrome displays the raw XML (eXtensible Mark-up Language) contents of this feed. Needless to say, it’s not intended for human consumption in this form, but rather for other programs to read and interpret.
Each time you publish a new post on your site, the RSS feed is updated with the contents of that post.
RSS feeds are used for a variety of purposes. The most common is a feed-reading program. By using such a program to watch a collection of RSS feeds, you can be notified whenever the referenced web sites post new content, and quite possibly read that content right there in the feed reader.
Ask Leo!, for example, has a feed people use to stay on top of what I’ve published lately. In fact, all my WordPress sites have an RSS feed, including The Ask Leo! Newsletter (feed), Ask Leo! On Business (feed), and HeroicStories (feed).
Technology that updates automatically and is intended for other software to consume … sounds like an opportunity!
RSS to email
Many email list providers have what’s called an “RSS to email” feature. All this means is that, once configured, the provider monitors the RSS feed of a specified web site, and when something new appears, emails that something new to a mailing list.
Our example mailing list provider, AWeber, calls this a “blog broadcast”.
Recall that there are two kinds of mailings: an “automated follow up” (a specific message sent to specific subscribers under a predefined conditions that apply to them individually, such as confirming a subscription, or a number of days passing), or a “broadcast” (which is simply a message you choose to send to all members of the list at once).
A blog broadcast is kind of inbetween: it’s automated in the sense that it happens automatically when your RSS feed is updated, but it’s a broadcast in that it goes to all subscribers at once. (By the way, don’t let the term “blog” get in the way – I’ll discuss it more in a future article, but this is more about the technology than whether or not what you’re doing is a blog or not.)
Hook up AWeber to your feed
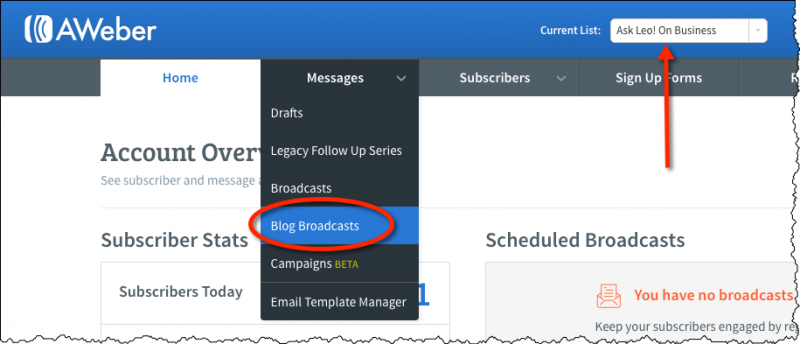
Log in to your AWeber account. Then, making sure you have the correct list selected at the top, hover the mouse over the Messages menu and click on Blog Broadcast.
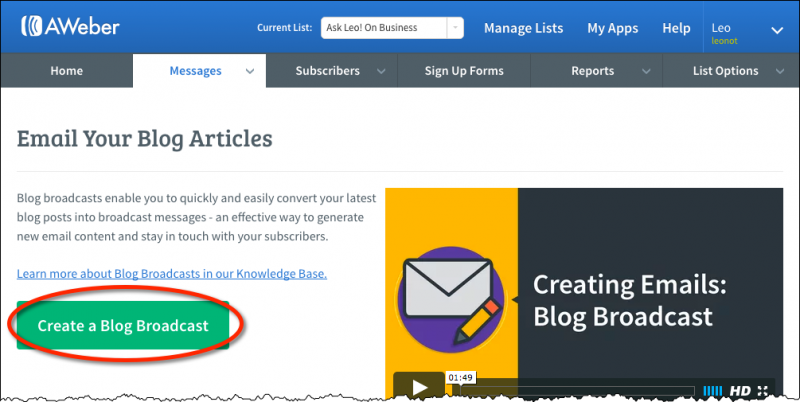
Since you have no blog broadcasts as of yet, this will take you to an introductory page. Click on the Create a Blog Broadcast button.
Next, we’ll specify the feed and appearance of our emails.
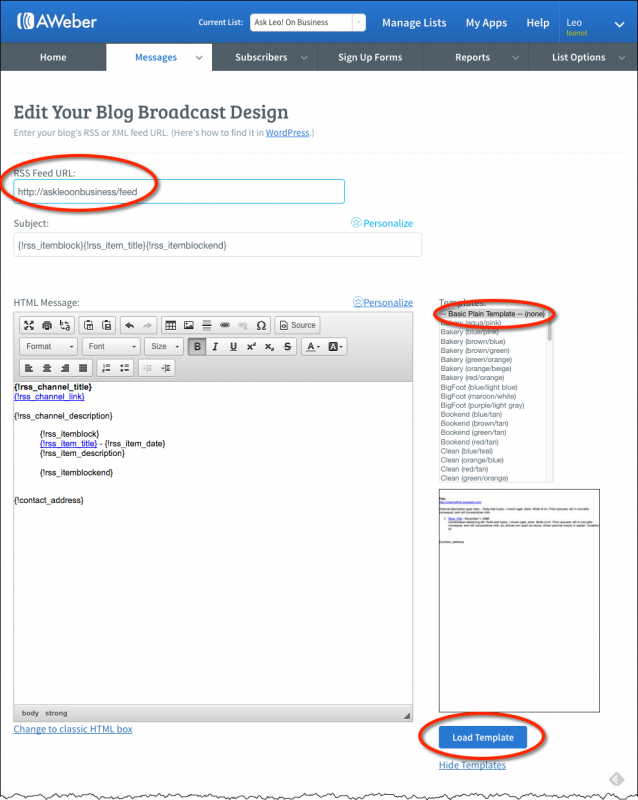
There are three things to note on this first part of the edit page:
- RSS Feed URL: this is where you enter your website’s feed. I’ve entered askleoonbusiness.com/feed.
- Templates: AWeber provides a number of templates to control the look and feel of the email generated by the blog broadcast. I’ve select the default, plain template.
- Load Template: after selecting a template above, click on Load Template to actually load the template into the editor.
There’s more to this page. Scroll down.
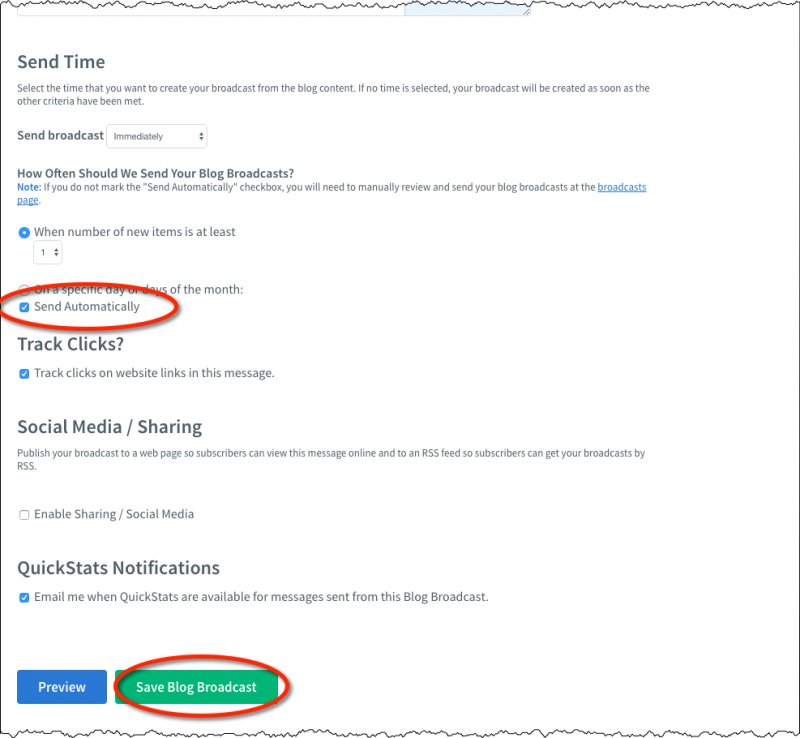
On this second half of the edit page there’s really only one setting that I want to discuss; the rest can be left as is.
Send Automatically does exactly what it implies: when checked, the email is automatically sent to your list. If it is not set, which happens to be the default, the message is “queued” to be sent as if you had created a broadcast message manually. We haven’t covered manual broadcasts, but ultimately it’s really just a way to check the email before it’s sent to all your recipients. As we’re just starting out, we have very few recipients, and we’ll be keeping things quite simple, so I’m going to suggest that you check this setting so that your broadcasts will be automatically sent.
Click on the Save Blog Broadcast button.
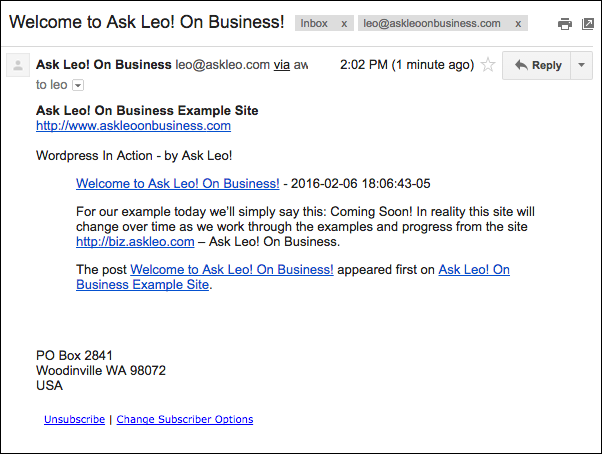
If you like, on the resulting page, click on the Send a test link, enter your email address into the resulting dialog (not shown) and click Send Test. You’ll receive an email with your most recent post as fetched from your website.

In our example case, we have only one post: the Welcome post that promises future content.
Let’s add some content and watch the process work.
Write a post and wait for the magic
Log in to your website’s administration interface, and create a new Post. Write whatever you like there. (You can delete it later.)
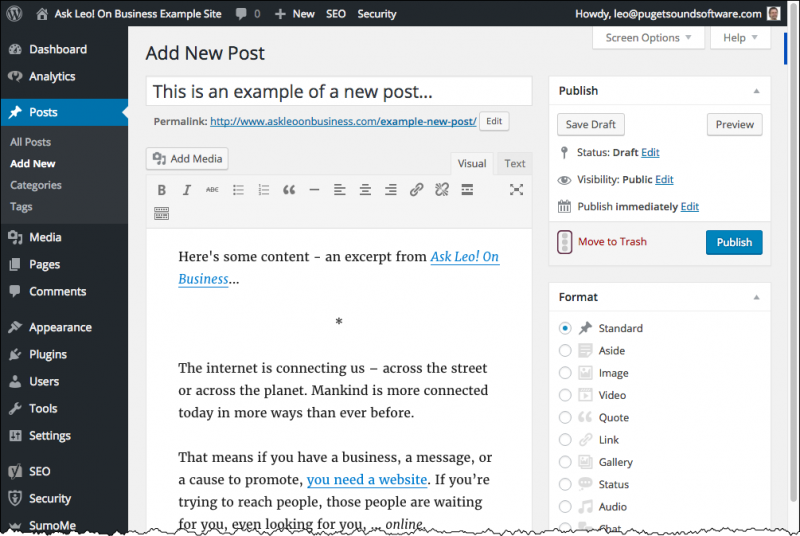
In the right-hand navigation bar, click on Publish, and your post goes “live” on your web site.
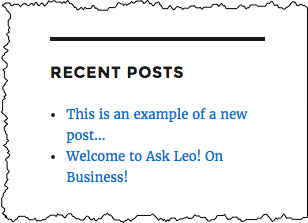
And now, we wait.
AWeber checks roughly once an hour – sometimes longer when their systems are heavily loaded. Once it detects that a new item is present, the email is sent.
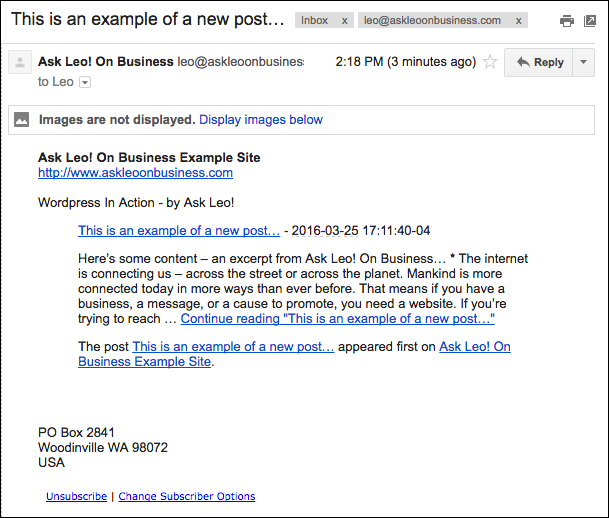
♥
Congratulations! You now have a platform on which to not only publish your work, but automatically send it out to your subscribers!
Naturally, there’s a tremendous amount of tweaking and customization you can do, as well as a number of other scenarios to make use of your mailing list as well as your content.
But as a place to start, you’ve got it nailed: just incremental improvements from here on out.
Podcast: Download (Duration: 5:58 — 2.9MB)
